Last updated on June 19th, 2025 at 04:24 am
We have created test cases for a test project in previous article now we can move towards to execute test cases in test link.
This is one of the best functionality of test link which indicates test manager that how many test cases are executed and how many test cases are failed. For executing test cases, Admin needs to assign test cases to the tester. Then and only then they can run the test scenario as per test cases.
If Test case runs successfully with expected result then tester can passed this test case in test link. After passing the test cases it will be highlighted with green color.
Now if test case is not run successfully then tester needs to post an issue for that scenario that this test case is not run as per expected result and developer need to resolve the error.
For above situation, Test cases will be failed by tester and he needs to mention issue ticket in comment that why he fails a test case. Once a developer will resolve the problem then he can again pass this test case and change his comment by ‘Verified and passed the test case’.
Before passing a test case tester needs to perform a test scenario of failed test case. If he is sure that expected result is coming for a test scenario then he can pass test case again.
Make sure that tester mentioned test case priority while creating test case. As per mentioned priority report will be generated for high, medium and low level scenarios. Due to this Test manger can verify the report that how many high level scenario have been tested and how application is stable.
Now we will move on steps which we need to perform for executing test cases in test link. First of all you need to login with test link. Enter your credentials and tab on ‘Login’ button. Afterwards select your test project.
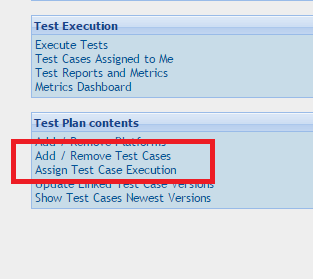
Here you will navigate on home page where you can find ‘Test Plan Contents’ tab.

Now you need to assign test cases to a user so they can execute test cases. User will not able to run test cases if admin does not assign any test cases to them. Now click on ‘Assign Test cases execution’ option in test plan contents tab.
Application will navigate you on below page. Here you will find that created test cases is placed left side. You need to select Test plan, Test Build and select filters as per your need from screen then need to click on ‘Apply’ button. Thus you will get all the created test cases and test suit on the page.

Now you need to select a test suit first then select test case as per the image. Afterwards you can assign this test case to a tester. Click on ‘Assign to’ tab and then select the name of user to whom you want to assign this test case and save the changes.
Test link gives you facility to assign test cases in bulk. For that you need to check test cases from screen and then assign it from ‘Bulk Assignment’ tab. You can also remove and edit rights for same. Only one user can execute test cases at a time.
Now again come on home page and Click on ‘Test Execution’ tab then click on ‘Execute Tests’.

Then application navigates you on the page where you can find your test cases for execution. Now select you test case and verify steps as per test scenario. If you have found expected result for an application then select ‘Pass’ status from bottom of the page and write a comment in box as ‘Verified test case’ and save the execution.
After execution you will find that a test case will get a comment as ‘Passed’ on top of the screen. Also it will display a name of user who passed it.

Passed test cases are turning on green color and same way you can failed the scenario and give comments accordingly.
Failed test cases are turning to red. One that test scenario will resolved then user can executes again and then it will turn in to green again.
This is the normal steps for execution test cases manually. Select Execution type as ‘Manually’ when you are creating test cases. Another option is executes test cases by Automation. We will learn it. This is all about running test cases successfully.
